Optimize Images for the Web
Background Information
When developing images to be published on the Web, special care needs to be taken for both the look and performance of the image. To assist the look, ALWAYS crop and resize images. The crop will focus the visitor on the most important part of the image, and the size will make a big difference in how th image lays out on the page. To assist performance, carefully consider the appropriate file type and compression. The three major file types are PNG (highest quality and supports transparencies, but may be larger files), GIF (supports transparencies and animations, but is only good for images with very few colors and sharp edges), and JPEG (great for detailed images with lots of colors and has small file sizes, but does not support transparencies or animation). Out of the three, only JPEG will give you compression options--choosing a level of quality to balance with file size.
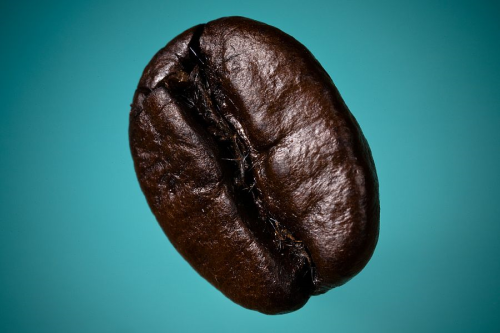
In this activity you will edit the image below to account for both look and performance. When you are finished, submit your new image to the shared folder. This assignment is due Wednesday, Sept 8.
Set Up the Workspace
- Copy the image above.
- Open Photoshop.
- Go to File, New... and OK on the dialog box.
- Paste the image into the workspace.
- Go to File, Save... and save the image as a PSD file somewhere in your Web folder.
Crop and Resize
- Crop the image so that the excess background on the sides is trimmed down.
- (Always crop first. By cropping, you are focusing the visitor's attention to the most important part of the image.)
- Go to Image, Image Size...
- Make sure the box to "constrain proportion" or "maintain aspect ratio" is checked.
- Set the width to 200 pixels.
- (In a Web page, you have unlimited height to work with, but most monitors allow for about 1000 pixels in width. That's why you should resize based on width. The actual width you choose for your images will depend on what you are using them for in your Web page.)
- Click ok.
- Save.
File Type and Compression
- The original image was PNG because the artist wanted lossless quality.
- We are willing to sacrifice quality for a smaller file size, so we will choose JPEG.
- Go to File, Save for Web...
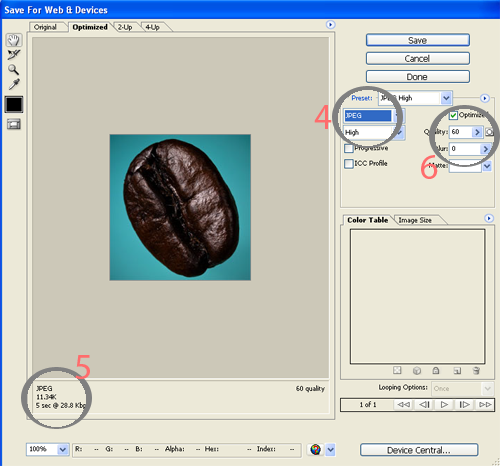
- In the menu at the right, select JPEG
- Notice near the bottom there is information about the anticipated file size and download time.
- Use the slider to turn the quality all the way down.
- Notice that the file size is super small, but... Yuck! That does a bad job on that picture!
- Use the slider until you find a quality that will get you a file size of about 10KB.
- There. That's an acceptable quality, and it's a nice small file.
- Click OK.
- Submit the JPG file to the shared folder.