Photoshop for Backgrounds
Part 1
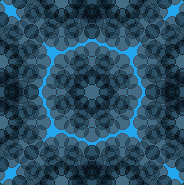
In this activity you will edit the image below. When you are finished, submit your new image to the shared folder. This assignment is due Friday, August 27.

(Used under the Creative Commons License from http://www.noqta.it/dromoscopio/)
Complete the steps below.
- To get started, highlight the image and use Ctrl+C to copy it.
- Open Photoshop and choose "File" and then "New"
- The "New" dialog box already has the dimensions of the file. Click OK and use Ctrl+V to paste the image into the work area.
- Save the file in your "Web" folder as "loginname_psbg.png"
- Open your template and add the style code below to the <head> section of your template.
<style type="text/css">
body {
background-image: url("loginname_psbg.png");
}
</style>
- Save the template and view it in a Web browser. Make sure the image shows up in the background.
- This tiling looks awful! Crop the image so that it looks like the one below.
- Save the image and view the template in the Web browser again. Much better!
- But it is still probably hard to read. Let's wash out that color so it is very light.
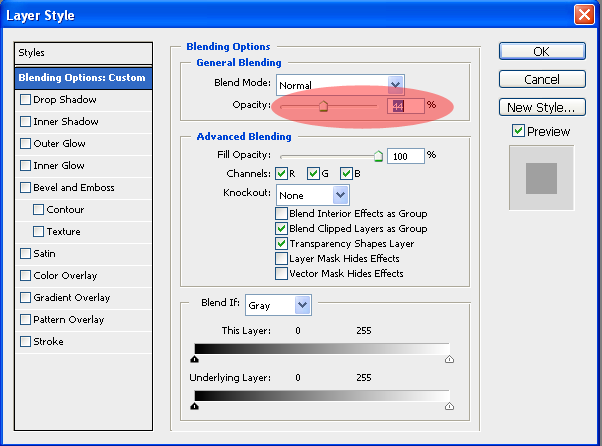
- There are lots of ways, but one is to create a new layer ("Layer" and "New"), draw a white box over the whole image, and adjust the opacity in the "Blending Options" of the Layer Style.
- Save and view your changes in the Web browser.
- In the Filter menu there are lots of filters to try. Select the original image layer and apply some filters until you get a look you like.
- Save and view in a Web browser.
- Submit the image file to the shared folder.
Part 2
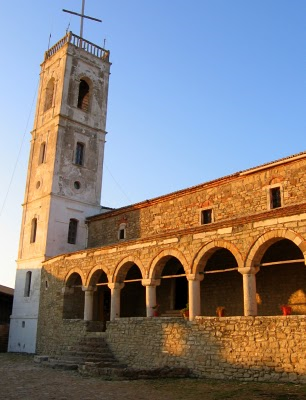
Complete this part ONLY if you are ON SCHEDULE or AHEAD for this week. Two more helpful techniques use the following photo:
- Copy the image into a new Photoshop workspace.
- Photoshop has a lovely background eraser tool, but most other photo editors don't. Many have a magic wand tool, so With them you can do the following:
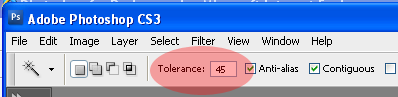
- Select the magic wand tool and click in the sky portion of the photo. It probably does not perfectly select all of the sky and none of the foreground. You may need to delete portions of the sky at a time, or adjust the tolerance (some editors call it "threshold").
- If you need to select more of the background, turn up the tolerance. If you need to select less, turn it down.
- Adjust the tolerance and delete portions of the sky until you get an appropriate photo. If you copied the image into the workspace you will automatically have a transparent background where you make deletions.
- To save transparencies you must save the file as a png or gif. PNG files are generally better quality than GIF although sometimes they may be slightly larger files.
- In addition to the transparent background at the top, let's say we want to make the rest of the background of our Web site the same color as some part of the photo. For this, use the eyedropper tool.
- Select the eyedropper and click on the part of the picture you want to match. Notice that the foreground color is now that color. If you open the color options, you can see the hexadecimal code for that color.