JavaScript Motion
Get the file:
- Open this file.
- Copy the contents into Notepad.
- Save your notepad as "motion.html" in your "javascript" folder.
- Get the images from the original and save them in your "javascript" folder too.
- Close the original and view the HTML file you saved in a Web browser.
- There are two main things to notice in the HTML: three container divs, and images (one for each div).
Create the External Script File
- In the <head> section of your HTML, add a script tag which references the JavaScript source file "motion.js"
- Open a new instance of Notepad.
- Save your new notepad as "motion.js"
Move a Graphic Horizontally
- Goal: Move the first graphic one direction.
- Since we want all the graphics on this page to move when the page loads, we can start all of the graphics moving in an onload event:
- Notice that the onload event is calling the function startGraphics. Let's write that next.
- We are using setTimeout to call a moveGraphic function after 50 miliseconds. The function has to be called this way because we don't want it to run immediately.
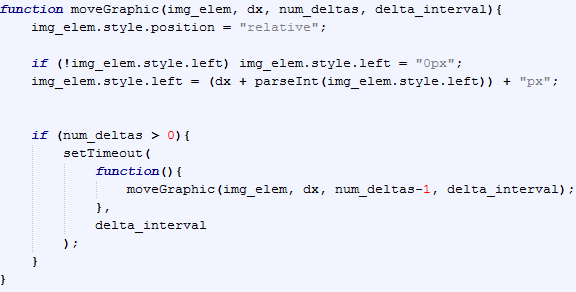
- Now for the guts of the functionality: the moveGraphic function.
- Take a moment to examine the parameters of the function--what are they and how are they used?
- Save and test by viewing in a Web browser.
Move a Graphic at an Angle
- Goal: Adjust the moveGraphic function so it will handle multiple directions.
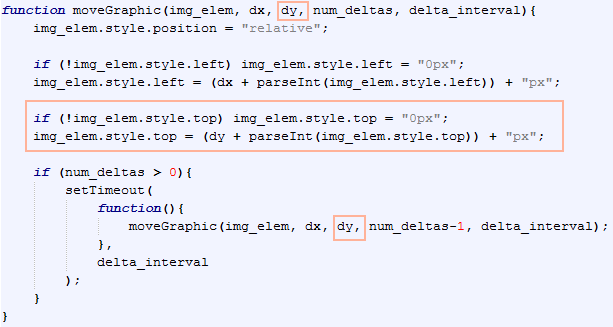
- That's great that this moveGraphic function goes horizontally, but we should make it handle both horizontal and vertical movement. Then we can use it for both of the first two graphics.
- Adjust the moveGraphic function so that it looks like below. The changes are boxed in a peachy color.
- Take a moment to consider what changed and why.
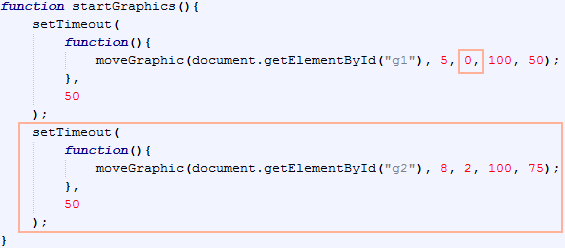
- Adjust the startGraphics function so it looks like below. The changes are boxed in a peachy color.
- Since we changed how the moveGraphic function is defined, we needed to add the new parameter to our first call. Then we set up the call for the other graphic.
- Save and test in a browser.
Enlarge a Graphic
- Goal: Write a new function to enlarge the last graphic.
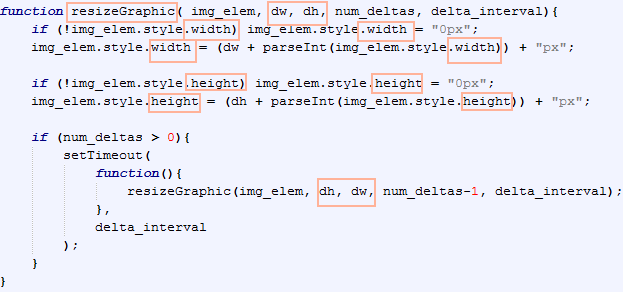
- This functionality is inherently different from moving right and down, but the code will be very similar.
- That means we can copy and past the moveGraphic function and make changes so that it looks like below. The changes to make are boxed in a peachy color.
- Then we simply have to call it for the third graphic. Add the code below to the startGraphics function.
- Save and test in a browser.
- This code does something very interesting. Notice how if you don't have a width and height set, it sets the starting width and height to zero. So...
- Let's use an inline style to quickly set a default height and width to the graphic. In your HTML, add the following attribute-value pair to the third image element.
- Save and test. Now your graphic keeps its starting size.